It's still snowing - snowed all day Saturday. Didn't go anywhere! Sewed all day.
Our photo book for baby Renee is almost done. Just to finish sewing through all the layers of pages so it won't fall apart when little hands are busy with the book. Here are photos of the process of getting the pages together.
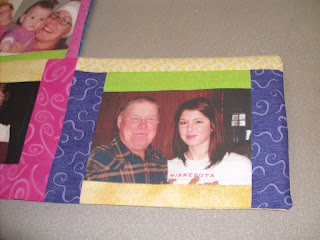
Sewed together two framed pictures and then put another set of two pictures, right side together, and put a piece of batting on, and serged aroung the edges, leaving an area open on the the bottom side so I could turn it right side out. Would you believe on the cover pages, I goofed the first time and had one page upside down! dah! had to cut around the serged area and fix, then reserge correctly. It made the cover a little smaller, but it still turned out ok and a little bigger than the other pages. Then another time, I serged around the whole page, forgetting to leave an opening! Had to cut some threads. Does anyone else ever goof like that?
This shows the other side of the serged piece before turned right side out.
Now to decide what order the pages should be - no special order, just a good mixture. Then hand stitched down the middle of all the pages for so pages won't shift when I machine stitch the middle seam.
You'll note the ribbon taggies I put on when I sewed the cover together. This is the inside of the front and back cover pages. The taggies off set each other when the book is closed. Decided not to do all the way around the book; and don't know know that I like it any better this way. Still undecided on a closure for the book. I need to buy more ribbon if I want to put ribbon on the front and back and when closed tie in bow. Didn't have any long enough so will have to buy more ribbon the next time I get to town.
Front cover.
The completed book has 14 picture pages inside, and when closed measures about 2 1/2 inches wide.
With the cover pages, there are 16 picture pages. Could have done more, but then I think it
would have been too bulky.
Back cover page.
Maybe I could sew a cute button on both the front and back cover, with an elastic that is tight on the back cover, not able to come off, and with a little elastic loop to pull over the button on the front cover. Wonder if that would be better than loose ribbon to tie.
Which option do you think I should do?
This is what I was working on most of the day Saturday. The "sweetpea" print is is lavendar and is so much prettier than this picture! I have it ready to quilt and hope to finish it today. It is a square table topper.
Odda was my helper and my "tail" - following me every time I moved from the kitchen, back to the sewing room, to sew pieces together, and then back again to kitchen to iron seams, or cut more, etc. etc. When I was busy, she'd lay down and nap a little or nuzzle me to pet her!


5 comments:
The photo book is great. What a perfect and special gift. Love the table topper. I am partial to all things purple.
Both are beautiful - wow you've been busy! I also love the purple!
It turned out wonderfully! Renee is going to love it. I like the button and loop idea. I think it will be easier to keep closed that way. A long ribbon would get soggy - if she is like my little ones, a ribbon would be in her mouth.
I love the sweat pea print for your quilt. Very pretty. Lavender/purple is such a nice color combination. Odda looks quite content to be your follower - such a big lovable baby.
Love the idea of the photo book and how about a fabric covered velcro closure. One that would be easy for a baby to open and close.
Purple is my favorite color so that table topper is perfect and I couldn't think of a better way to spend a snowy day than sitting at my machine.
It turned out really cute..she is going to really like it! I like the idea of a button closure..but with a real fabric button hole tab..that way she could button and unbutton. What ever you choose ..it is a treasure:)
Post a Comment